Aug 282014
 

SR YO tutorial | The Knitting Vortex

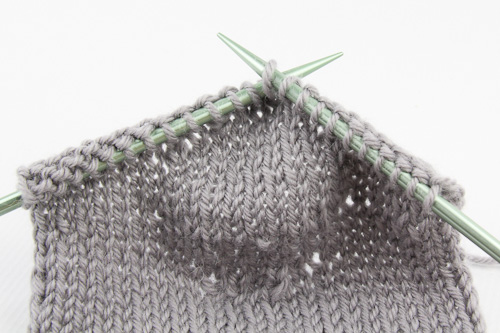
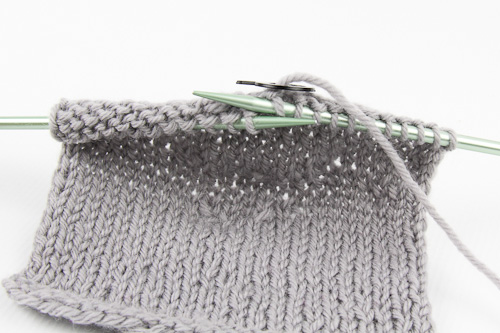
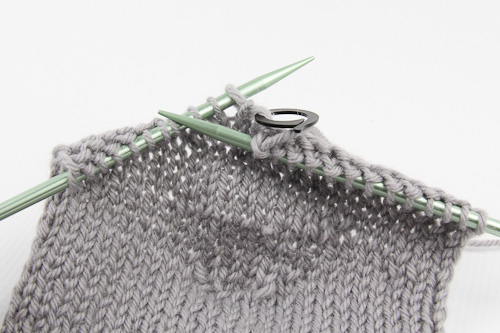
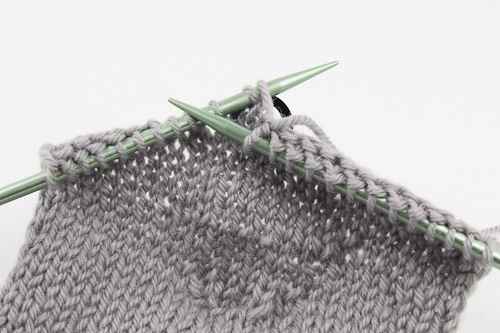
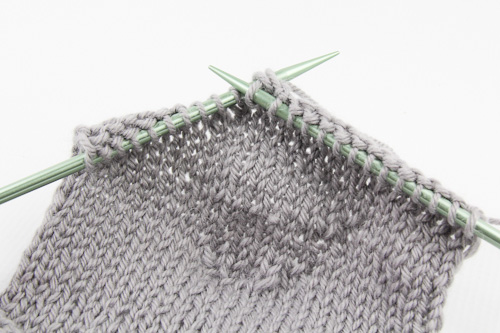
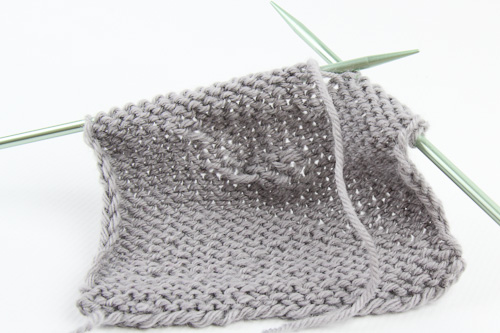
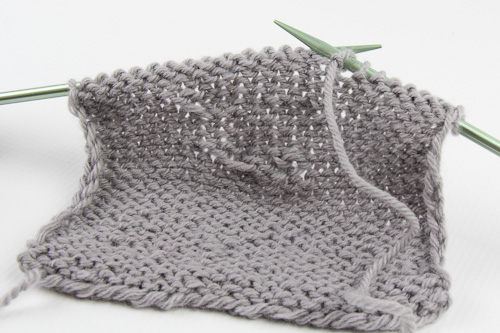
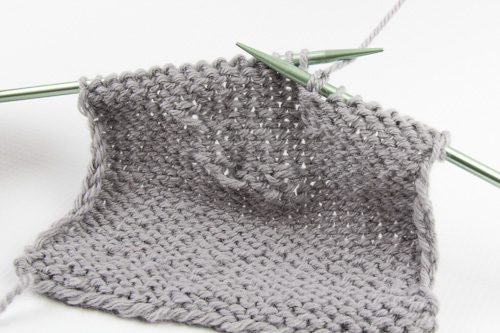
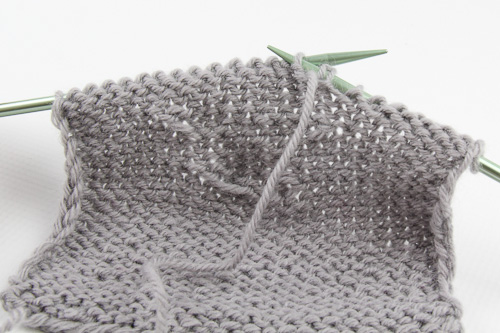
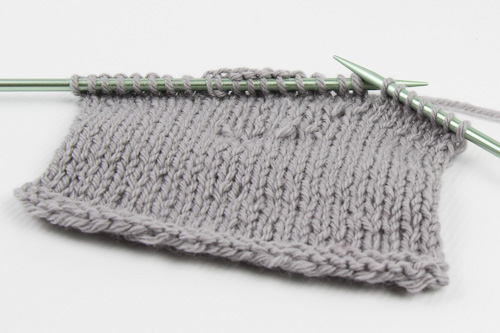
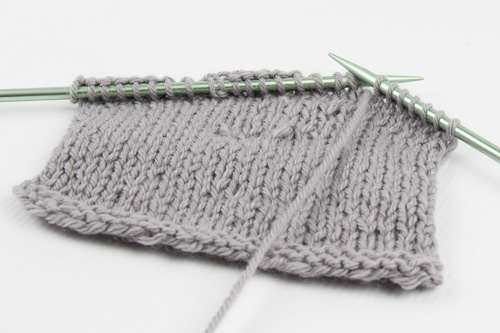
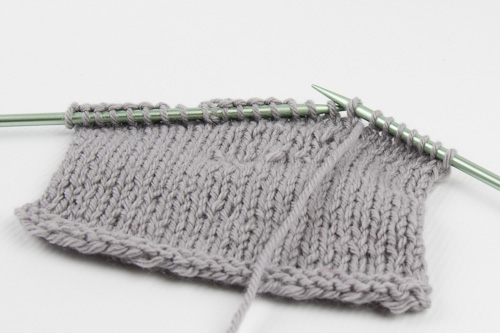
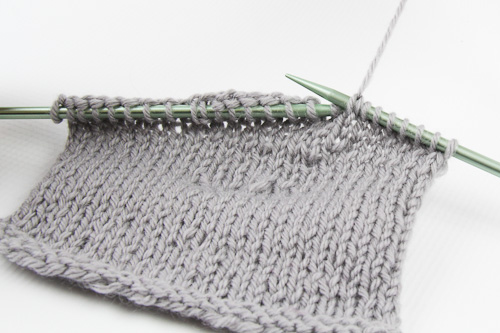
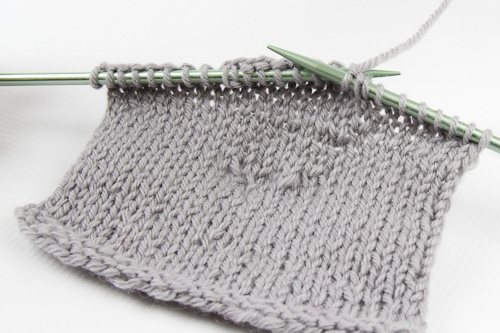
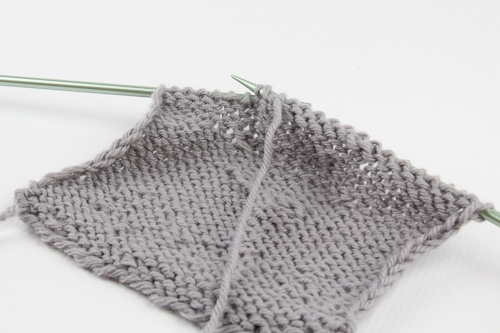
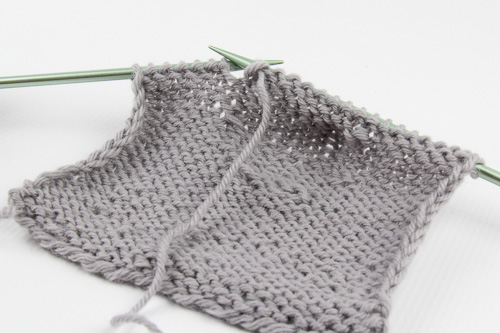
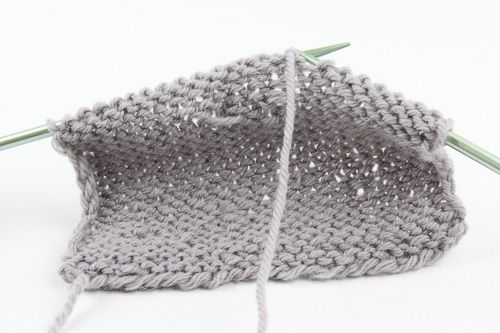
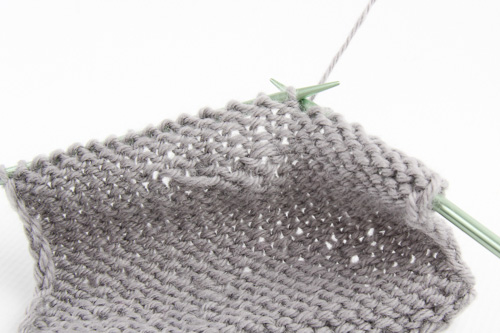
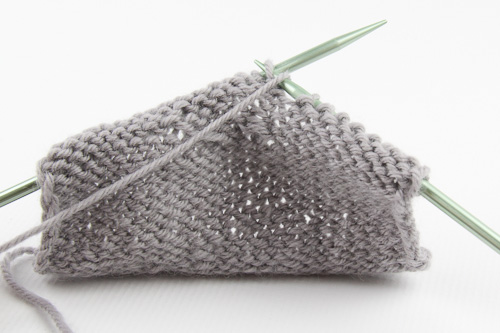
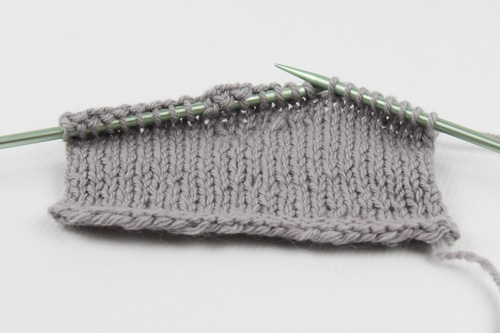
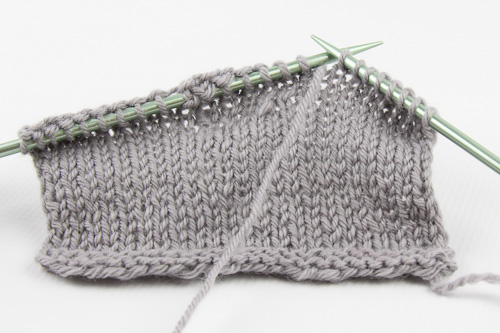
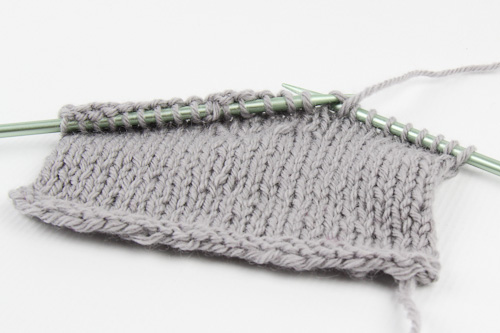
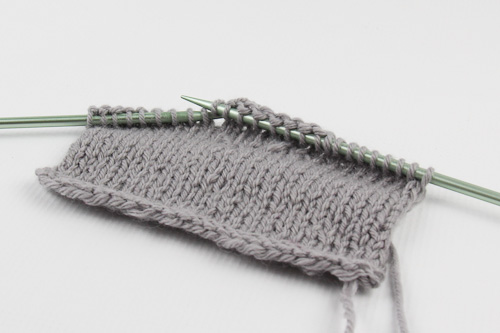
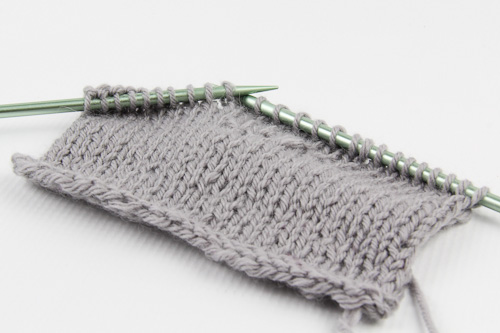
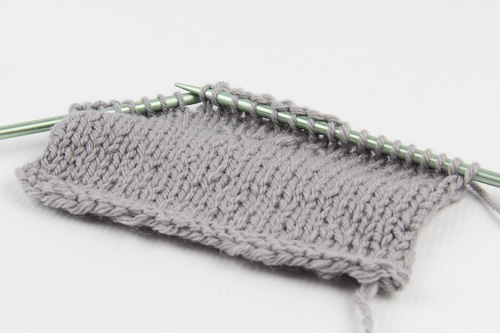
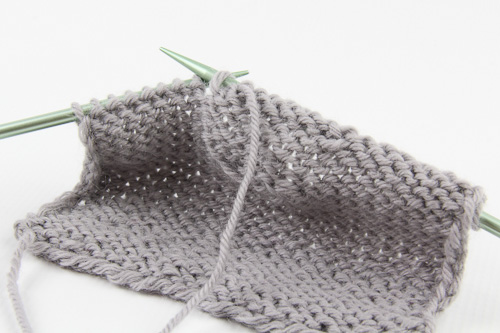
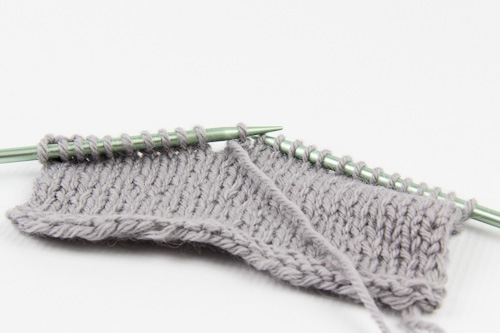
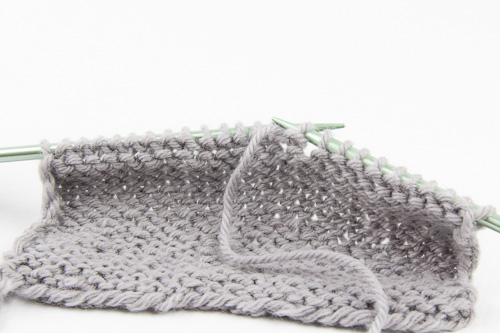
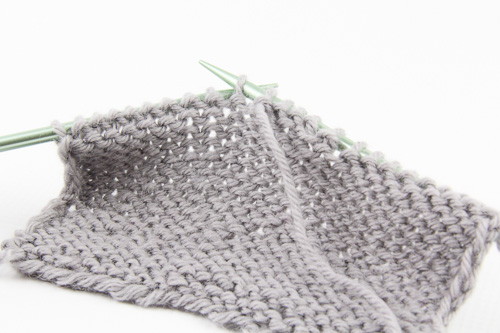
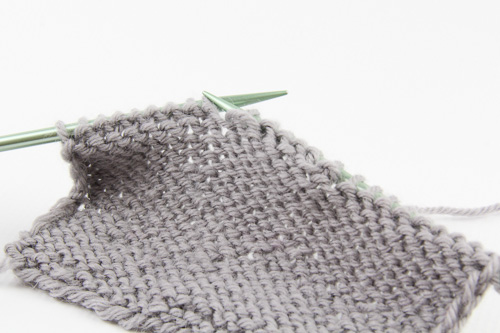
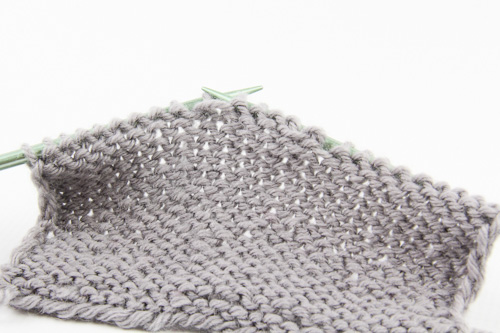
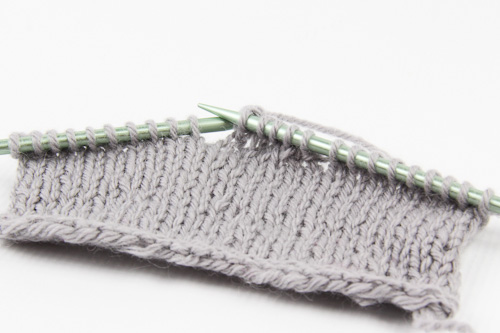
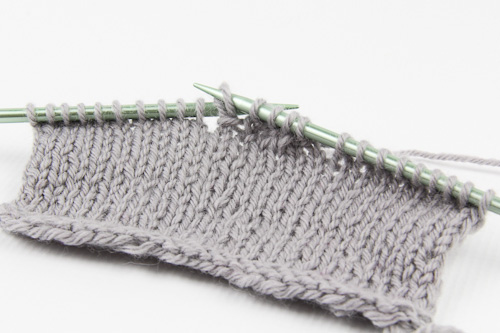
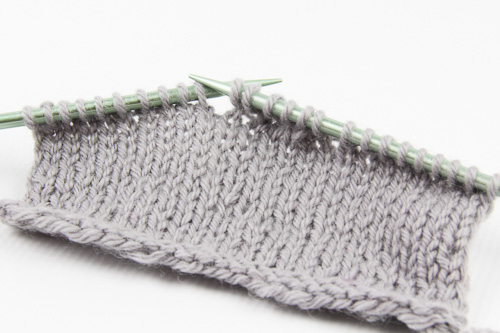
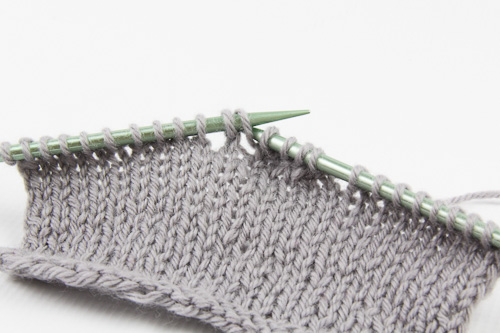
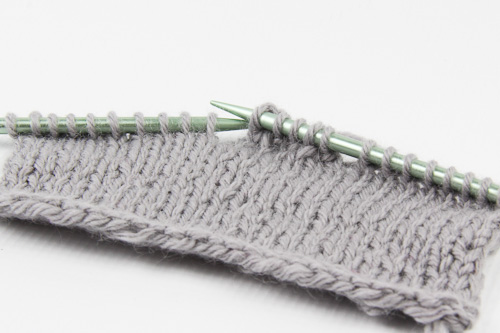
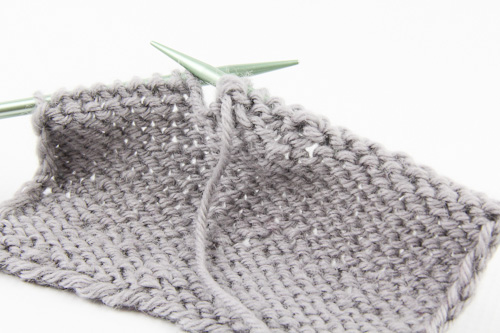
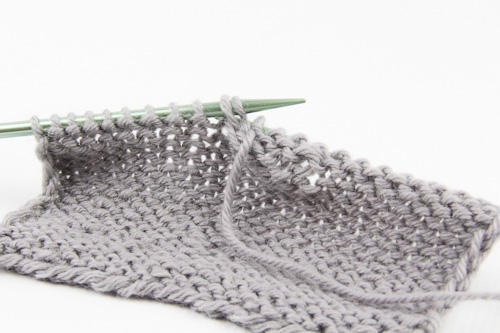
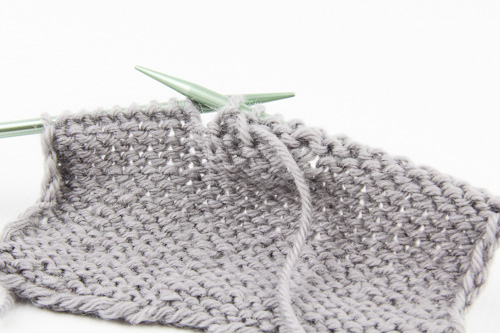
The second in my series of tutorials for working Short Rows demonstrates the yarnover method; this technique uses a backwards yarnover instead of wrapping the turning stitch, and then works that extra loop to disguise the turning point.

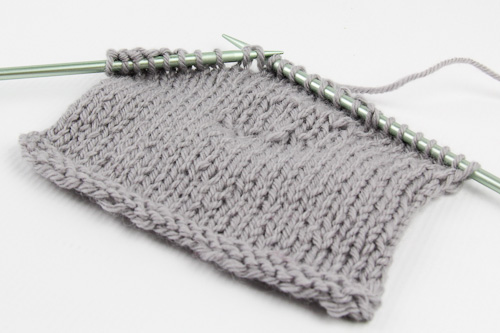
To yarnover on a knit row:

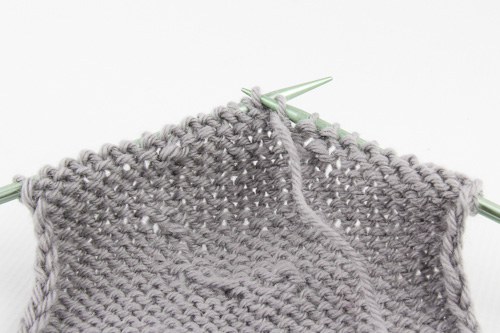
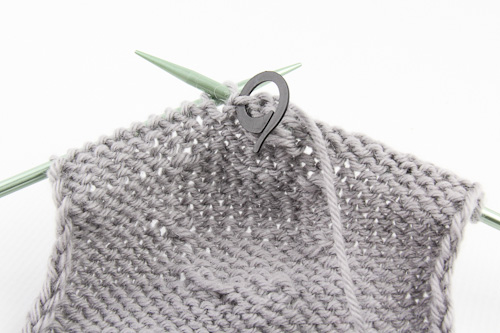
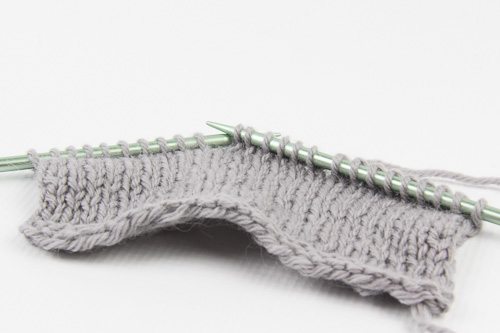
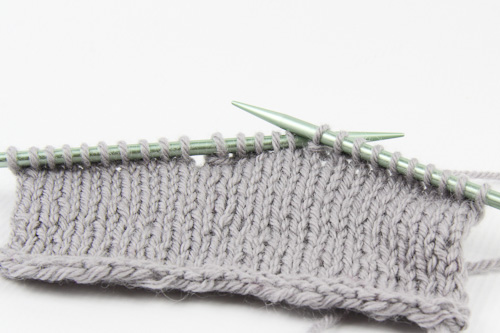
1. Knit to the turning point, and turn the work.

SR YO1 The Knitting Vortex

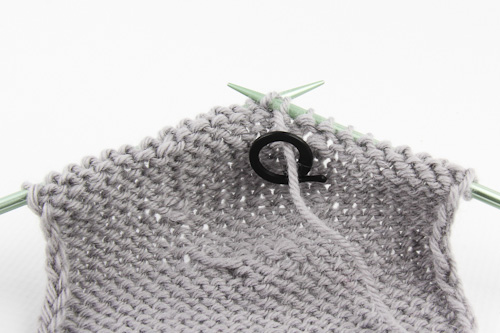
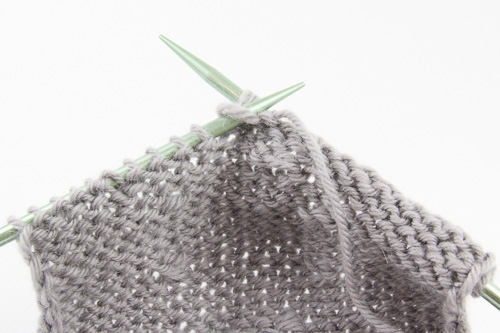
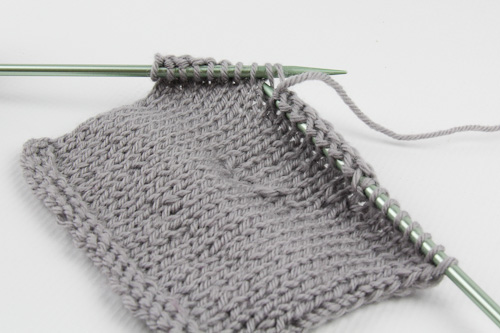
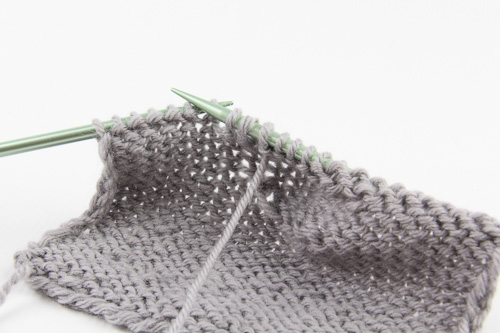
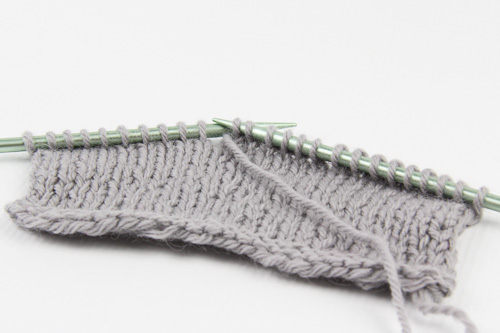
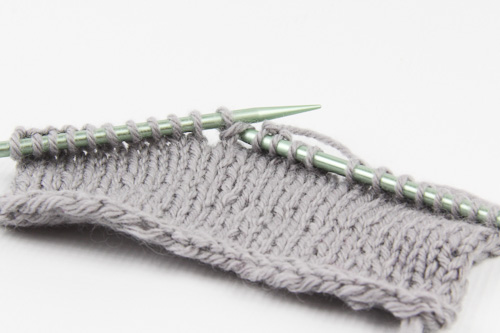
2. Make a backwards YO by bringing the yarn to the back between the needles . . .

SR YO2 The Knitting Vortex

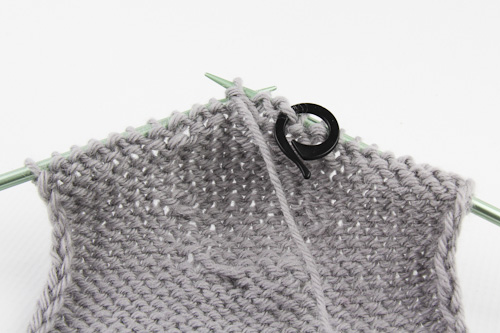
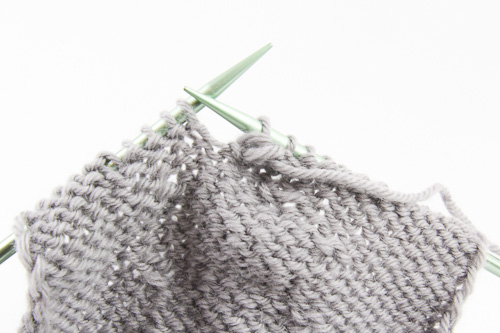
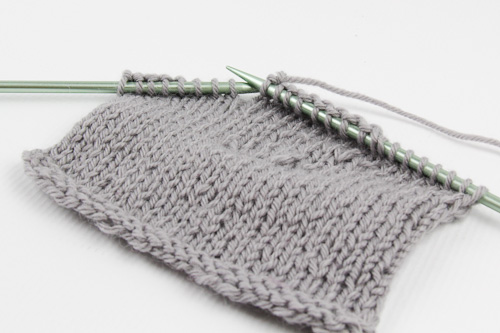
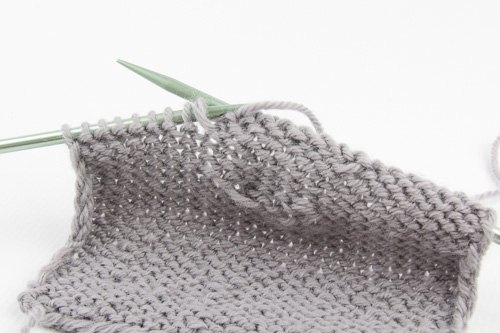
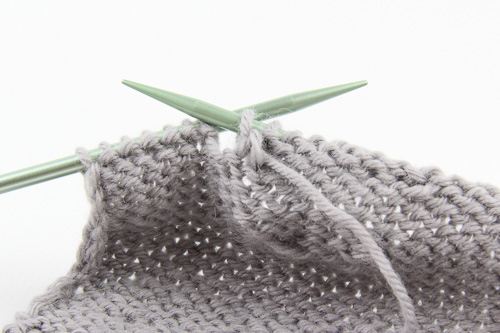
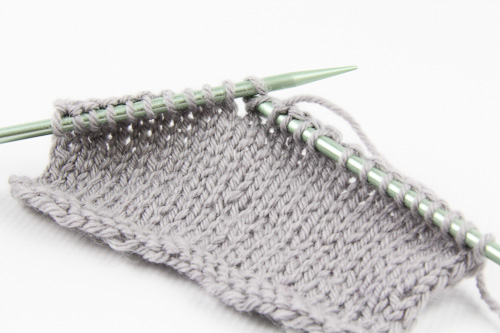
3 .  . . . and then over the right needle to the front again; purl the next row. Purling that first stitch may be a bit fiddly with the yarnover coming over the needle, but it helps to hold it in place with your finger.

SR YO3 The Knitting Vortex

To yarnover on a purl row:

1. Purl to the turning point, and turn the work.

SR YO6 The Knitting Vortex

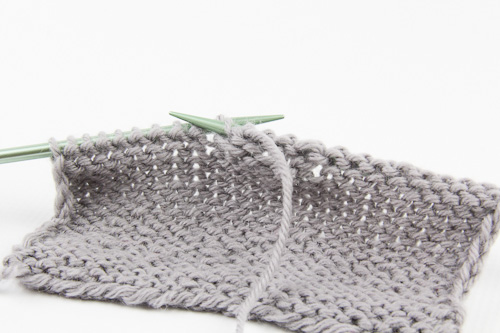
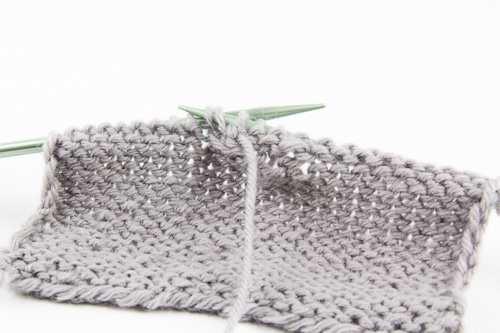
2. Make a backwards YO by bringing the yarn to the front between the needles . . .

SR YO5 The Knitting Vortex

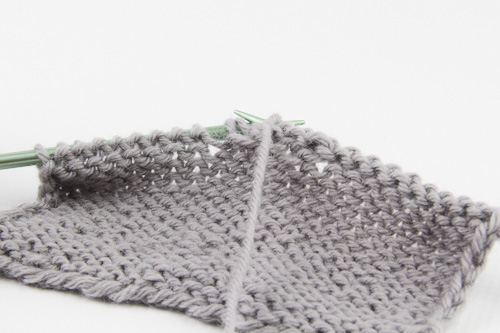
3.  . . . and then over the right needle to the back again; knit the next row.

SR YO6 The Knitting Vortex

To work the yarnover on a knit row:

1. Knit to the YO, which will be mounted backwards on the left needle; slip the YO knitwise to the right needle, correcting the stitch mount.

SR YO7 The Knitting Vortex

2. Return the YO to the left needle without twisting it.
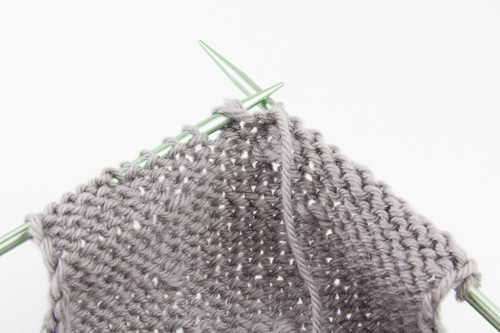
SR YO8 The Knitting Vortex

3. Knit the YO together with the next stitch.

SR YO9 The Knitting Vortex

To work the yarnover on a purl row:

1. Purl to the YO, and slip the YO knitwise to the right needle, twisting it.

SR YO10 The Knitting Vortex

2. Slip the next stitch knitwise to the right needle, twisting it.

SR YO11 The Knitting Vortex

3. Return both the stitch and the YO to the left needle; both are mounted backwards.

SR YO12 The Knitting Vortex

3. Purl the YO together with the next stitch through the back loops.

SR YO13 The Knitting Vortex

I find the yarnover method to have a bit of a sloppy result, especially on the purl side. For a better way to use yarnovers to disguise the turning point, the next tutorial will be Short Rows using the German method.

For the other tutorials in the Short Rows series, see:

Short Rows using the wrap & turn method

Short Rows using the German method

Short Rows using the Japanese method

Short Rows using the Shadow Wrap method

What I Did On My Summer Vacation 2014

 Images  Comments Off on What I Did On My Summer Vacation 2014
Aug 182014
 

Going bicoastal, and international as well, we followed my daughter’s Pacific Northwest leanings and visited Victoria, British Columbia and Seattle, Washington. It was ALOT of travel the first day, but then we woke up to this.

Victoria Harbor, B.C.

And traveled outside the old-timey sort of city for the nature part of the trip – beaches and trees.

Vancouver Island beach

Avatar grove, Vancouver Island

Repatriated once again, it was Seafair week, with ships and the Blue Angels.

Seafair fireboat, Seattle harbor

The entire trip was uncharacteristically sunny and hot (except for the last morning’s ride back to the airport), so we had great touristing.

Seattle

Which means we probably need to go back to experience the greyness.

All images courtesy of my panorama-loving spouse, Gary Karlsrud. Yes; used with permission.


Tarry

 New Release, Patterns, Sweaters  Comments Off on Tarry
Aug 082014
 

Stop and smell the roses; linger with the sunset, and tarry awhile. This relaxed tee is meant for lazy mornings, long lunches, and walks in the gentle moonlight. Worked seamlessly from the top down in a cotton and linen blend, it features lacy saddle shoulders for a touch of pretty whimsy, and a smooth stockinette body with matching lace panels at each side, all knit seamlessly to the rounded hems. Wear it on gentle, warm days wherever you wander.

Construction: Tarry is a feminine tee, designed to be easy and casual with a semi-fitted boxy silhouette. The lace shoulder saddles are worked first, then stitches are picked up for the front and and back, which are shaped with a few short rows and worked back and forth to the bottom of the armholes. The body is then joined to work in the round, including the lace insets at each sideseam, with gentle shaping through the waist and hip. The curved shirttail hem is worked back and forth using short rows, and finished all in one piece with the garter hem. Stitches are picked up at the scooped neckline and the armholes to work matching narrow garter edgings.

Techniques & Skills Used: knit/purl, increasing/decreasing, longtail CO, backwards loop CO, short rows, picking up stitches. The lace stitch pattern is both written and charted, and a link to my short row tutorial is included.

Size: 32 (35, 38, 41, 44, 48, 52)” bust; sample shown in third size worn with 3” of positive ease. For a slightly oversized fit, choose a size with several inches of positive ease.

Yarn: Knit Picks Cotlin (70% tanguis cotton, 30% linen; 123 yards/112m/50g), shown in Swan; 6 (6, 7, 8, 8, 9, 10) balls, or approximately 625 (700, 775, 875, 975, 1100, 1200) yards of dk weight linen/cotton or linen blend yarn.

Other Materials: US 5 (3.75mm) 32” circular needle or size to match gauge; US 4 (3.5mm) 16” circular needle or 32” if using Magic Loop method for neckline and armhole edging; Stitch markers (4); Stitch holders (2); Yarn needle.

Gauge: 22 st and 28 rows/4” in stockinette st; 20 st and 32 rows/4” in Lace pattern; after blocking.

See it on Ravelry or on Payhip, to read more or purchase the pattern.     

Shadow Dial

 New Release, Patterns, Sweaters  Comments Off on Shadow Dial
Jul 232014
 

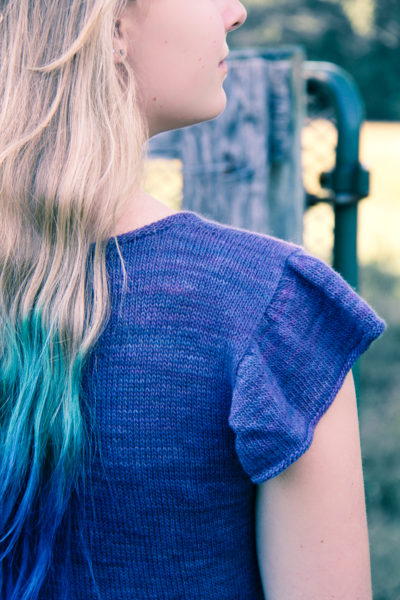
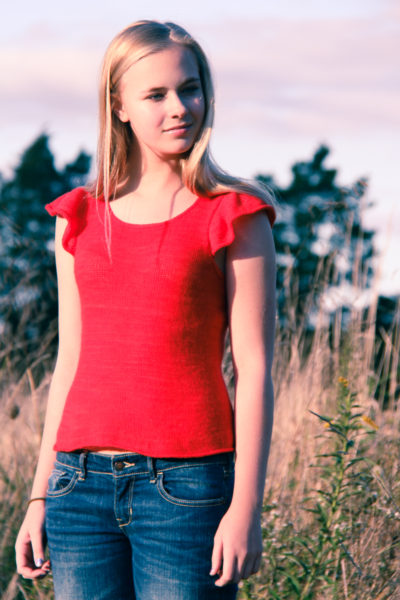
Light as a whisper and soft as a shadow, this simple tank top is knit in stockinette stitch with flutter cap sleeves. Laceweight yarn on larger needles creates a fabric with beautiful drape, while gentle waist shaping and simple details keep the look uncomplicated. The body is worked seamlessly from the bottom up with a scooped neckline and narrow purl edgings; stitches are picked up around the armholes then rapidly increased and worked in short rows to create the focal feature flutter sleeves. Shadow Dial is pretty and light, and just right for summer.

Shadow Dial is a new version of the Sundial Tee, which was published in Knitscene Summer 2013. It has more drape and an improved fit at a slightly more relaxed gauge of 24 st and 34 rows/4”, with an expanded range of ten sizes, which all include added length and a reshaped upper body with better strap coverage and a more deeply scooped front neckline. Additional detailed instructions for the upper body and flutter sleeve shaping have also been included, with a link to my short row photo tutorial.

Construction: The body of Shadow Dial is worked in the round from the bottom up, then divided for front and back and knit flat to the shoulders, which are joined with a 3-needle bind off. The flutter cap sleeves are worked back and forth with short rows, then the sleeve and armhole edge is finished in the round.

Techniques & Skills Used: knit/purl, increasing/decreasing, short rows (with link to my tutorial), picking up stitches, 3-needle bind off.

Size: 30 (32, 34, 36, 38, 40, 42, 44, 48, 52)” bust; this top may be worn with negative ease for a fitted look, or a bit of positive ease for a more casual effect; sample shown in fourth size worn with 1” positive ease.

Yarn: Malabrigo Yarn Lace (100% baby merino wool; 470 yards/430m/50g); 2 (2, 2, 2, 3, 3, 3, 3, 3, 4) skeins, shown in Violetas, or approximately 800 (850, 900, 950, 1050, 1100, 1150, 1200, 1350, 1450) yards of laceweight yarn.

Other Materials: US 6 (4mm) 24” circular needle or size to match gauge; Extra US 6 needle or dpn for 3-needle BO; Stitch markers (1 each colors A & B, 2 color C); Stitch holders (3); Yarn needle.

Gauge: 24 st and 34 rows/4” in stockinette stitch, after blocking.

See it on Ravelry or on Payhip, to read more or purchase the pattern.     

Sundial Tee

 New Release, Patterns, Sweaters  Comments Off on Sundial Tee
Jul 232014
 

Originally published in Knitscene Summer 2013, my Sundial Tee pattern is also available as an individual download from The Knitting Vortex. I’ve added just a bit of length, but other than that the pattern remains a close-fitting tank as it first appeared in the magazine. I’ve also included expanded shaping instructions for the neckline and the short row flutter sleeves, as well as linked my short row tutorial. Sundial is a very fitted tank; for a slightly more relaxed, modern fit knit at a larger gauge, I’ve also reworked the design and expanded the size range to ten sizes as Shadow Dial, available on Ravelry and Payhip. Whichever you choose, the soft and luscious laceweight yarn makes a pretty, romantic tee for the summer.

A splash of color flutters in the breeze, drawing the eye . . . like a poppy in the field. This simple tank top is knit in stockinette stitch with short row flutter sleeves. Laceweight yarn worked at a small gauge creates a wearable and figure-conscious fabric, which hugs the body in this fitted top. Gentle waist shaping, a scooped neck and narrow shoulders further define the shape, while the cap sleeves add softness and romance. The body is worked seamlessly from the bottom up with narrow purl edgings; stitches are picked up then rapidly increased and worked in short rows creating the fluttery sleeves. Sundial is a summer tank that is simple but special.

Techniques & Skills Used: knit/purl, increasing/decreasing, short rows (with link to tutorial), picking up stitches, 3-needle bind off.

Size: 28.5 (32, 35.5, 39, 43)” bust; this slim tank is designed to be worn with some negative ease for a fitted look. Sample shown in smallest size with 4” negative ease.

Yarn: Malabrigo Yarn Lace (100% baby merino wool; 470 yards/430m/50g); 2 (2, 2, 3, 3) skeins, shown in Bergamota, or approximately 725 (825, 925, 1050, 1200) yards of laceweight yarn.

Other Materials: US 5 (3.75mm) 24” circular needle or size to match gauge; Extra US 5 needle or dpn for 3-needle BO; Stitch markers (1 each colors A & B, 2 color C); Stitch holders (3); Yarn needle.

Gauge: 27 st and 34 rows/4” in stockinette stitch, after blocking.

See it on Ravelry, to read more or purchase the pattern.     

Layercake

 New Release, Patterns, Sweaters  Comments Off on Layercake
Jul 162014
 

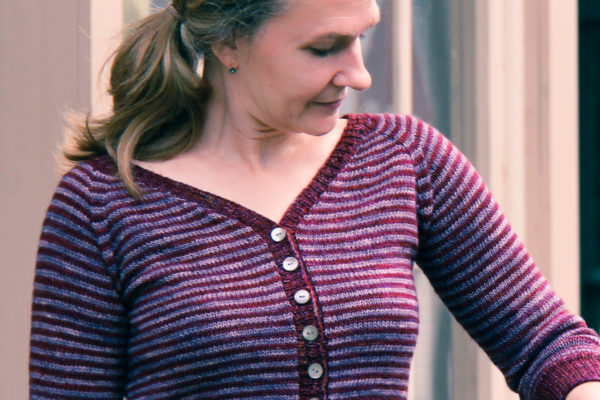
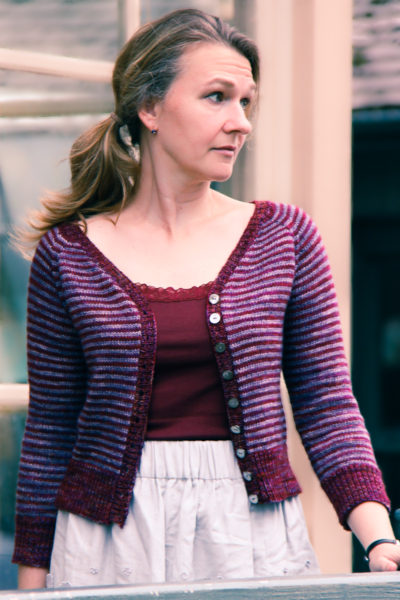
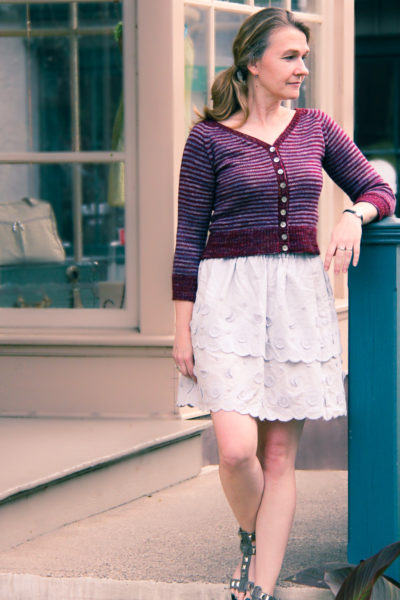
A delicious cropped cardigan worked seamlessly from the top down, Layercake features raglan construction and narrow stripes. Long ribbed cuffs end three-quarter length sleeves and match the wide hem which defines the waist. The ribbed buttonband is picked up and worked along the deep V-neck. In confectionary hues or your favorite color combination, this sweet cardi is a light layer over any outfit.

Construction: Layercake is cast on at the neckline, and worked with raglan construction and front neckline increases to create the deep V-neck, with 2-row stripes throughout. Sleeves are divided and put on hold, while the body is worked straight to the deep ribbed hem. Bracelet length sleeves are then worked with shaping to similar deep cuffs. Finally, stitches are picked up all along the front edge and neck, and a 1″ ribbed buttonband is worked with yarnover buttonholes.

Techniques & Skills Used: raglan construction, knit/purl, increasing/decreasing, cable CO, backwards loop CO.

Size: 30 (32, 34, 36, 38, 40, 42, 44, 48, 52)” bust; sample shown in fourth size worn with 1” of positive ease

Yarn: Madelinetosh Tosh Merino Light (100% superwash merino wool; 420 yards/384m/100g), shown in Alizarin (MC) and Sugar Plum (CC). 2 (2, 2, 2, 2, 3, 3, 3, 3, 3) skeins MC and 1 (1, 1, 1, 1, 2, 2, 2, 2, 2) skeins CC, or approximately 600 (650, 700, 750, 800, 850, 900, 950, 1050, 1150) yards MC and 300 (325, 350, 375, 400, 425, 450, 475, 525, 600) yards CC of fingering weight yarn.

Other Materials: US 5 (3.75mm) 32” circular needle or size to match gauge; Stitch markers (10); Stitch holders (2); Yarn needle; ½” buttons 8 (9, 9, 9, 9, 10, 10, 10, 11, 11); Matching sewing thread and needle.

Gauge: 22 st and 32 rows/4” in stockinette stitch, after blocking.

See it on Ravelry or on Payhip, to read more or purchase the pattern.     

Tutorial: Short Rows using the wrap & turn method

 Tutorials  Comments Off on Tutorial: Short Rows using the wrap & turn method
Jul 132014
 

SR w&t tutorial | The Knitting Vortex

Short Rows are one of my very favorite knitting things, ever. Need to shape a hem, make a bust dart or a shoulder slope? No seaming, no binding off, no problem – just work short rows and you can have angled sections of knitting that create shape and make a garment better fitting, or a shawl more interesting.

There are many ways to work short rows, all of which involve working a partial row (thus, the “short”) and then using one of several methods to turn the work and go back in the opposite direction, while making the turning point unobtrusive and attractive. Perhaps the most common and basic is the wrap & turn method, sometimes abbreviated to w&t. To work it, here’s what you have to do:

To w&t on a knit row:

1. Knit to the turning point; with yarn in back, insert the right needle tip purlwise into the next st, and slip it to the right needle.

2. Bring the yarn to the front.

SR w&t3 | The Knitting Vortex

3. Slip the wrapped st back to the left needle.

SR w&t4 | The Knitting Vortex

4. Turn the work, and if you’re working in stockinette stitch, bring the yarn to the front and purl the next row. If you’re working in garter stitch, leave the yarn in back when you turn the work, and knit the next row.

SR w&t5 The Knitting Vortex

To w&t on a purl row:

1. Purl to the turning point; with yarn in front, insert the right needle tip purlwise into the next st, and slip it to the right needle.

SR w&t6 The Knitting Vortex

2. Bring the yarn to the back.

SR w&t7 The Knitting Vortex

3. Slip the wrapped st back to the left needle.

SR w&t8 The Knitting Vortex

4. Turn the work and bring the yarn to the back and knit the next row. If you’re working in garter stitch, every row is a knit row, and you’ll be following the directions above instead.

SR w&t9 The Knitting Vortex

In stockinette stitch, the wraps would be visible in the fabric if just left there when you came back and worked the wrapped stitch on a subsequent row. To avoid that, you can hide the wrap by picking it up and working it together with the wrapped st.

To pick up a wrap on a knit row*:

1. Insert right needle tip knitwise into the front of the wrap.

SR w&t10 The Knitting Vortex

2. Then insert needle knitwise into the wrapped st.

SR w&t11 The Knitting Vortex

3. Knit the wrap and the st together as one.

SR w&t12 The Knitting Vortex

*Alternate Version – sometimes the wrapped stitch can be a bit wonky after it’s worked, because the wrap isn’t pulled completely to the back. If you find this to be the case, try an alternate version of picking up the wrap:

1. Insert right needle tip purlwise into the wrapped st and slip it to the right needle.

SR w&t alt1 The Knitting Vortex

2. With left needle tip, lift the wrap over the st and place it to the right of the st on the right needle. This takes a bit of manipulation.

SR w&t alt2 The Knitting Vortex

3. Slip both st and wrap back to the left needle.

SR w&t alt3 The Knitting Vortex

4. Knit the wrap and the st together as one.

SR w&t alt4 The Knitting Vortex

To pick up a wrap on a purl row*:

1. Insert right needle tip purlwise into the back of the wrap.

SR w&t13 The Knitting Vortex

2. Place the wrap onto the left needle.

SR w&t14 The Knitting Vortex

3. Insert right needle purlwise into both wrap and st.

SR w&t15 The Knitting Vortex

3. Purl the wrap and the st together as one.

SR w&t16 The Knitting Vortex

*Alternate Version – as on the RS, sometimes the wrapped stitch can be a bit wonky after it’s worked; try this alternate version of picking up the wrap to make it more invisible:

1. Insert right needle tip purlwise into the back of the wrap.

SR w&t13 The Knitting Vortex

2. Place the wrap over the st and onto the left needle, to the left of the st. Again, some manipulation is necessary.

SR w&t alt6 The Knitting Vortex

3. Purl the wrap and the st together as one.

SR w&t alt7 The Knitting Vortex

In garter stitch, there is generally no need to pick up the wraps, since they disappear into the garter fabric; just knit subsequent rows, leaving the wraps where they are. For this reason, I like the quick and easy wrap & turn method when I’m working garter stitch. Depending on your yarn, w&t may not be the tidiest method when working in stockinette stitch, especially if the purl side will be visible. For other short row methods, I’ll be posting additional tutorials in the upcoming weeks.

Short Rows using the yarnover method

Short Rows using the German method

Short Rows using the Japanese method

Short Rows using the Shadow Wrap method
Katie Scarlett

 New Release, Patterns, Wraps  Comments Off on Katie Scarlett
Jun 022014
 

I unveiled Miss Scarlett in March; originally a Wooly Wonka Fibers 2014 Heroines Shawl Club exclusive, Katie Scarlett is now available as a pdf download.

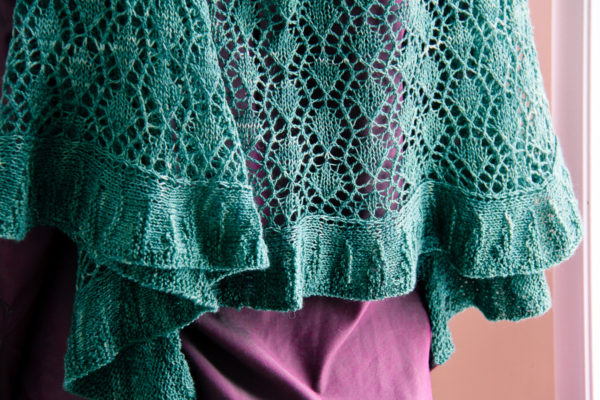
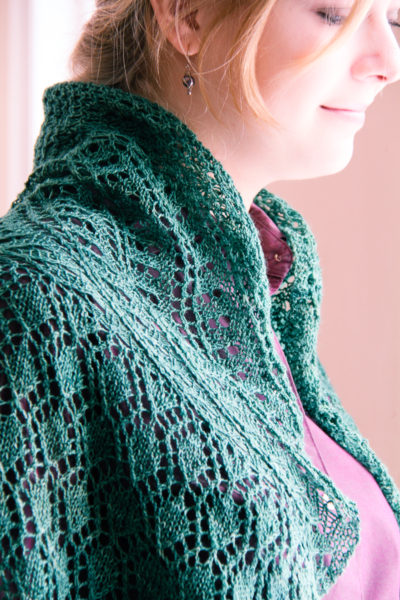
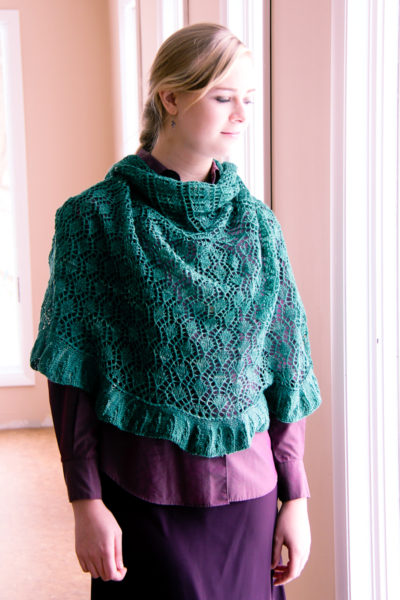
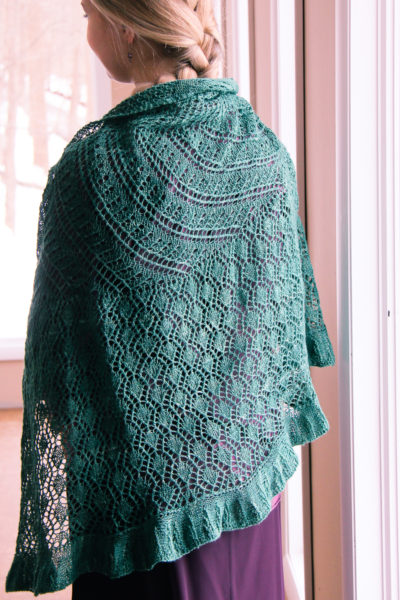
The belle of the ball will always be Katie Scarlett O’Hara, the indomitable heroine of Gone With The Wind. Even dressed in a green velvet curtain, she is unapologetically flirtatious, enticing and captivating. This semi-circular shawl is worked from the top down in the shape of a hoopskirt like those worn by Miss Scarlett, using a beautiful wool and silk blend laceweight yarn. Four different lace patterns represent our heroine’s journey. Like her gentle upbringing, simple increases grow into a regular, small scale eyelet mesh, which becomes a swirling diagonal reflecting the tumultuous Civil War years, and finally straightens into strong vertical lines of hard edged diamonds just like her headstrong and determined character. The knit-on ruffled edging is worked sideways in small short row sections and attached to the live stitches of the shawl, avoiding long rows and proving that perseverance will pay off. After all, tomorrow is another day.

Techniques & Skills Used: garter tab, cable CO, knit/purl, lace; this pattern is both fully written and partially charted for the lace patterns.

Size: 78” wingspan and 28” depth, after blocking.

Yarn: Wooly Wonka Artio Lace (80% Blue Faced Leicester wool, 20% silk; 875 yards/100g); 1 skein, shown in Twelve Oaks. Pattern requires 815 yards/93g; see Designer’s Notes for information on adjusting yardage.

Other Materials: US 5 (3.75mm) 40” circular needle; Scrap yarn for provisional CO; Stitch markers; Yarn needle.

Gauge: 24 st and 30 rows/4” in Diamond Lines stitch pattern; 24 st and 32 rows/4” in stockinette stitch, after blocking. Gauge is not critical for this project, however a different gauge may result in a smaller or larger finished shawl, and different yardage requirements.

See it on Ravelry, to read more or purchase the pattern.   

Lorem Ipsum

 New Release, Patterns, Sweaters  Comments Off on Lorem Ipsum
May 292014
 

A feminine cropped cardigan with geometric eyelets, Lorem Ipsum is knit seamlessly from the top down, incorporating simple lace with the techniques of raglan sweater knitting. In graphic design, Lorem Ipsum dolor sit amet begins the scrambled Latin text often used as a placeholder, focusing attention on the style elements of a document. Likewise, this easily-memorized, small scale pattern highlights the raglan sleeves and deeply scooped neckline, without competing. The lace is designed to flow without interruption around the cardi, transitioning to a flattering single rib hem, cuffs and neckline. With a simultaneously worked garter button band and minimal finishing, the focus is all on style in this flattering little sweater.

Construction: Lorem Ipsum is cast on at the neckline and worked in an allover lace pattern, with raglan construction and a deep front scoopneck. Sleeves are divided and put on hold, while the body is worked straight to the hem. Slim bracelet length sleeves are then worked with shaping to the cuffs. Finally, stitches are picked up all along the front edge and neck, and a 1” ribbed buttonband is worked with yarnover buttonholes.

Techniques & Skills Used: raglan construction, knit/purl, increasing/decreasing in pattern, cable CO, backwards loop CO. Stitch patterns are both written and charted, and include instructions for shaping the raglan sleeves in pattern.

Size: 32.75 (34.5, 36, 37.75, 39.25, 42.5, 44.75, 48, 50.5)” bust; sample shown in third size worn with 1” of positive ease.

Yarn: Malabrigo Yarn Finito (100% merino wool; 200 yards/183m/50g), shown in Plomo; 4 (4, 4, 4, 5, 5, 6, 6, 7) skeins, or approximately 650 (700, 750, 800, 850, 1000, 1100, 1200, 1300) yards of fingering weight yarn.

Other Materials: US 5 (3.75mm) 32” circular needle or size to match gauge; Stitch markers (10); Stitch holders (2); Yarn needle; ½” buttons, 12 (12, 13, 14, 14, 15, 16, 17, 18 ); Matching sewing thread and needle.

Gauge: 20 st and 32 rows/4” in Eyelet pattern; after steam blocking.

See it on Ravelry or on Payhip, to read more or purchase the pattern.    

New Yarn . . .

 Images, Yarn  Comments Off on New Yarn . . .
May 072014
 

and mixed feelings. Exultant over the fabulous stash enhancement, at excellent prices. And despairing at the reason for the sale – my fave LYS is closing. It’s always sad when a small, indie business shuts its doors, and it makes me re-commit to buying local in the effort to prevent more of the same from happening. In this case, the owner of Down Cellar is relocating for family reasons, and there’s no one to step in and take over. Even though as a consumer I cant really help with that in this case, maybe I can in others. That’s a thought to sticky-note to the computer as a reminder during future surfing sessions.

sad yarn