Silverado

 Featured, New Release, Patterns, Sweaters  Comments Off on Silverado
Sep 242014
 

A seamless cardigan with swingy fronts and unusual construction, Silverado is the best kind of simple yet interesting knitting. Texture abounds in the reverse stockinette ground, ribbed sleeves and 3-dimensional wave cables, finished with a simple applied I-cord front and neck edge. The cozy wrap front can be worn open or closed with a pin, and is just the right layer when there’s a chill in the air.

Construction: The back and sleeves of Silverado begin in the topdown raglan style, then as the sleeves are divided from the body, stitches are picked up along the front raglan seamlines for the fronts, which are shaped with increases and cables.

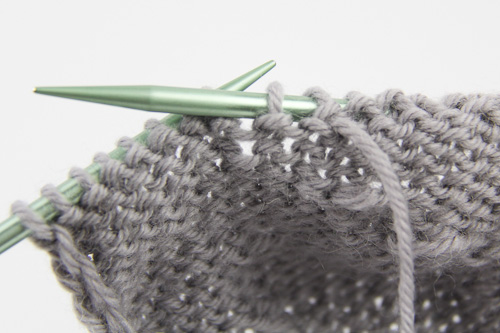
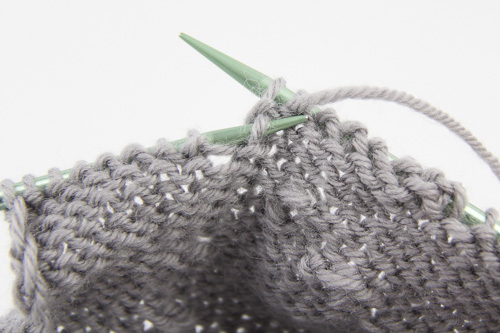
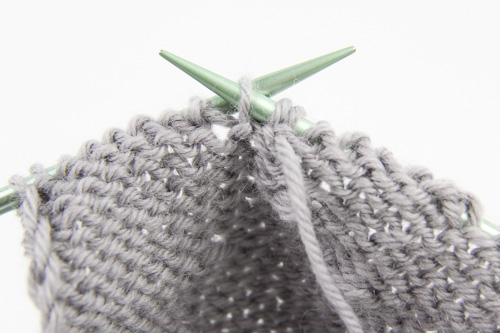
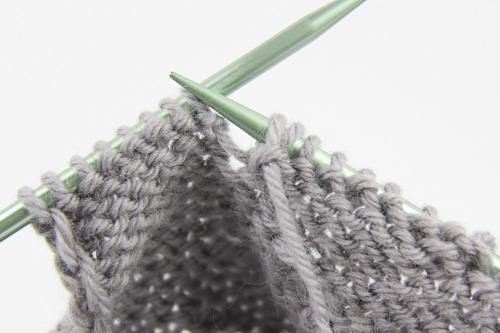
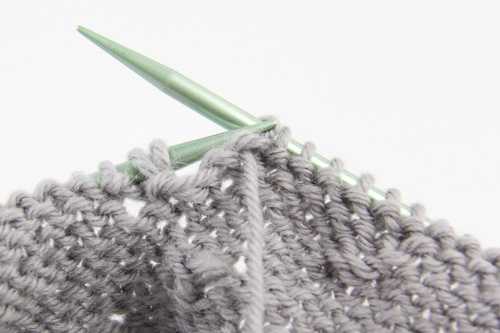
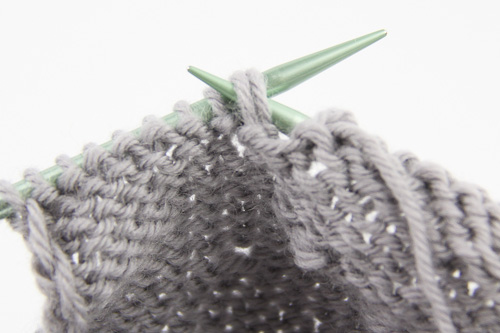
Techniques & Skills Used: raglan construction, knit/purl, increasing/decreasing, longtail CO, backwards loop CO, picking up stitches, cables, applied I-cord (cable CO). Silverado is a fully written pattern, with the cables both written and charted; there is also a video tutorial for the applied I-cord.

Size: 33 (34.5, 36.5, 38, 40, 42.5, 45.5, 48, 50.5)” upper bust, based on twice the back width at bottom of armhole; the shaped fronts of this cardigan make each size very versatile; choose a size based on upper bust measurement. Sample shown in second size with 1” positive ease.

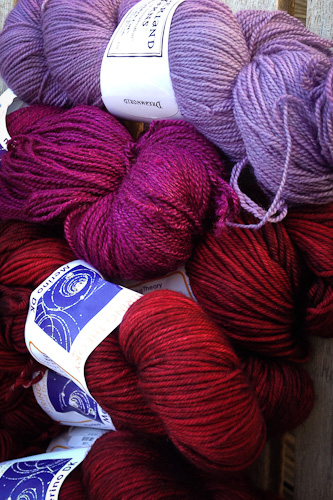
Yarn: Malabrigo Yarn Merino Worsted (100% merino wool; 210 yards/192m/100g), shown in Frost Gray; 4 (4, 4, 5, 5, 5, 6, 6, 7) skeins, or approximately 750 (775, 825, 900, 950, 1025, 1150, 1225, 1350) yards of worsted weight yarn.

Other Materials: US 8 (5mm) 32” circular needle or size to match gauge; Stitch markers (6); Stitch holders (2); Cable needle; Yarn needle.

Gauge: 18 st and 24 rows/4” in stockinette stitch, 20 st and 24 rows/4” in slightly stretched P1K1 Rib, after blocking.

See it on Ravelry or on Payhip, to read more or purchase the pattern.      

Sep 092014
 

Short Rows tutorial using the shadow wrap method | The Knitting Vortex

The final post in my series of tutorials for working Short Rows demonstrates the Shadow Wrap method, promulgated by Socktopus. As in the German and Japanese methods, an extra loop is made from the row below to disguise the turning point; the extra loop in this case is a stitch worked into the stitch below just before turning, creating a twinned stitch at the turning point. Later both loops of the twinned stitch are worked together to close the gap.

The Shadow Wrap method on a knit row:

1. Knit to the turning point, then knit into the stitch below the next stitch on the left needle, creating a twinned stitch.

SR shadow wrap tutorial1 | The Knitting Vortx

2. Slip this twinned stitch to the left needle without twisting it.

SR shadow wrap tutorial2 | The Knitting Vortex

3. Turn the work, and purl the next row.

SR shadow wrap tutorial3 | The Knitting Vortex

The Shadow Wrap method on a purl row:

1. Purl to the turning point, then slip the next stitch purlwise to the right needle.

SR shadow wrap tutorial4 | The Knitting Vortex

2. Insert the left needle tip into the stitch below the slipped stitch on the right needle, lifting the front leg; purl into this stitch with the right needle, creating a twinned stitch.

SR shadow wrap tutorial5a | The Knitting Vortex

SR shadow wrap tutorial5b | The Knitting Vortex

SR shadow wrap tutorial5c | The Knitting Vortex

3. Slip this twinned stitch to the left needle without twisting it.

SR shadow wrap tutorial6 | The Knitting Vortex

4. Turn the work and knit the next row.

SR shadow wrap tutorial7 | The Knitting Vortex

To work the twin stitch on a knit row:

1. Knit to the twinned stitch, which is easy to see, and knit both loops together as one.

SR shadow wrap tutorial8a | The Knitting Vortex

SR shadow wrap tutorial8b | The Knitting Vortex

To work the twinned stitch on a purl row:

1. Purl to the twinned stitch, which again is easy to see, and purl both loops together as one.

SR shadow wrap tutorial9a | The Knitting Vortex

SR shadow wrap tutorial9b The Knitting Vortex

I like that the twinning is done prior to turning the work, and that the twinned stitch is very obvious to see later on when it’s time to close the gap. The actions are pretty basic, although making the twin on the purl side takes a bit of manipulation. For me, the result was a bit messier than the Japanese and German methods, but the procedure overall was simpler; as ever, the choice of methods will depend on the yarn and gauge, and where the short rows are being used. Next up will be a recap post evaluating the results of all five methods I’ve presented.

For the other tutorials in the Short Rows series, see:

Short Rows using the wrap & turn method

Short Rows using the yarnover method

Short Rows using the German method

Short Rows using the Japanese method


Garden State Sheep & Fiber

 Random Thoughts, Yarn  Comments Off on Garden State Sheep & Fiber
Sep 072014
 

This weekend was New Jersey’s 20th annual fiber fest, and although it’s small, I like to think of it as powerful. There are four barns full of animals, fleece, spinning, shows and vendors – just enough for a good half day, with the added bonus of being local for me.

Almost everything is under cover, which worked out nicely this year in the feels-like 100 degree heat, followed in the afternoon by drenching thunderstorms. I left before the actual rains came, but felt like I had been soaked anyway by that time from the humidity.

The shade helped them, but the animals were hot too; the sheep that were getting sheared seemed pleased to lose the extra insulation. This guy was a blue ribbon winner, and he looked totally over it.

Sheepbreeders Festival 2014 ram | The Knitting Vortex'

The angora bunnies were alert, but keeping motion to a minimum.

Sheepbreeders Festival 2014 angora rabbit | The Knitting Vortex

There were kids leading sheep around the show ring, the local spinners’ guild doing their thing, lots of fibery crafts (SO many felted things!) and a super array of booths from indie dyers. I even ran into some friends unexpectedly, so ended up re-touring the entire festival with them. The heat did sap my energy eventually, but not before I enhanced my stash; it turned out to be a romantic, plummy, red sort of day.

Sheepbreeders Festival 2014 yarn | The Knitting Vortex

Tutorial: Short Rows using the Japanese method

 Tutorials  Comments Off on Tutorial: Short Rows using the Japanese method
Sep 052014
 

Short Rows Japanese method tutorial | The Knitting Vortex

The fourth in my series of tutorials for working Short Rows demonstrates the Japanese method. As in the German method, an extra loop is pulled up from below to disguise the turning point; instead of pulling it up with a YO, the working yarn is marked when the work is turned and later pulled up to create the extra loop at the time of closing the gap. This method requires a removable stitch marker, bobby pin or scrap yarn to mark the loop to be pulled up.

The Japanese method on a knit row:

1. Knit to the turning point, and turn the work; slip the next stitch purlwise.

SR Japanese 1 | The Knitting Vortex

2. Place a removable stitch marker on the working yarn at the front of the work.

SR Japanese 2 | The Knitting Vortex

3. Purl the next row as needed.

SR Japanese 3 | The Knitting Vortex

The Japanese method on a purl row:

1. Purl to the turning point, and turn the work; slip the next stitch purlwise.

SR Japanese 7 | The Knitting Vortex

2. Place a removable stitch marker on the working yarn at the back of the work; knit the next row as needed.

SR Japanese 8 | The Knitting Vortex

To close the gap on a knit row:

1. Knit to the gap; the stitch marker is at the back of the work.

SR Japanese 4 | The Knitting Vortex

2. Pull up a loop of yarn by pulling on the stitch marker, and place the loop on the left needle.

SR Japanese 5 | The Knitting Vortex

3. Knit the loop and the next stitch together as one; continue knitting.

SR Japanese 6 | The Knitting Vortex

To close the gap on a purl row:

1. Purl to the gap, where the stitch marker is at the front of the work, and slip the next stitch purlwise to the right needle.

SR Japanese 9 | The Knitting Vortex

2. Pull up a loop of yarn by pulling on the stitch marker, and place the loop on the left needle..

SR Japanese 10 | The Knitting Vortex

3. Slip the stitch on the right needle back to the left needle without twisting it.

SR Japanese 11 | The Knitting Vortex

4. Purl the stitch and the loop together as one; continue purling.

SR Japanese 12 | The Knitting Vortex

The Japanese method in my opinion is the tidiest on both the RS and WS, since the absence of wraps and YOs means that there’s very little excess yarn. It does take a bit longer to work because you have to place and remove the marker that indicates where to pull up a loop, but it’s simple to do. With some experience, and depending on the yarn texture, size and color, you might even be able to see which loop to pull up without marking it.

The next tutorial will demonstrate another way of pulling up a stitch, with Short Rows using the shadow wrap method.

For the other tutorials in the Short Rows series, see:

Short Rows using the wrap & turn method

Short Rows using the yarnover method

Short Rows using the German method

Short Rows using the Shadow Wrap method


Tutorial: Short Rows using the German method

 Tutorials  Comments Off on Tutorial: Short Rows using the German method
Sep 022014
 

SR german method tutorial | The Knitting Vortex

The third in my series of tutorials for working Short Rows demonstrates the German method; this is another technique which uses a yarnover instead of wrapping the turning stitch, but instead of the yarnover itself becoming the extra loop, it’s used to pull up a stitch from below to disguise the turning point.

The German method on a knit row:

1. Knit to the turning point, and turn the work. Note that when using this method, you will work up to and including the turning stitch. In the w&t method, you’re technically working to one stitch before the turning stitch.

SR German method1 The Knitting Vortex

2. Slip the next stitch purlwise.

SR German method2 The Knitting Vortex

3. Bring the working yarn to the back over the right needle, and pull upwards so that the stitch below the slipped stitch is pulled partially up onto the needle. This creates what appears to be an odd-looking double stitch, but it’s not a mistake.

SR German method3 The Knitting Vortex

4. Bring the working yarn to the front again between the needles; purl the next row.

SR German method4 The Knitting Vortex

The German method on a purl row:

1. Purl to the turning point, and turn the work.

SR German method5 The Knitting Vortex

2. Bring the working yarn to the front between the needles.

SR German method6 The Knitting Vortex

3.  Slip the next stitch purlwise.

SR German method7 The Knitting Vortex

4. Bring the working yarn to the back over the right needle, and pull upwards so that the stitch below is pulled partially up onto the needle creating what appears to be a double stitch.

SR German method8 The Knitting Vortex

5. Knit the next row. On this side, the work is sometimes a little bit tighter because the yarn is already at the back and so has less distance to travel.

SR German method9 The Knitting Vortex

To work the double stitch on a knit row:

1. Knit to the double stitch, which is very obvious in the row.

SR German method10 The Knitting Vortex

2. Insert the right needle tip knitwise under both of its front legs.

SR German method11 The Knitting Vortex

3. Knit both legs together as one.

SR German method12 The Knitting Vortex

To work the double stitch on a purl row:

1. Purl to the double stitch, which again is obvious to see; insert the right needle tip purlwise under both of its front legs.

R German method14 The Knitting Vortex

2. Purl both legs together as one.

SR German method15 The Knitting Vortex


To me, the German method looks great on both the RS and WS, and it’s easy to work. The double stitch is very obvious, once you get used to how wonky it looks. The next tutorial will demonstrate another way of pulling up a stitch, with Short Rows using the Japanese method.

For the other tutorials in the Short Rows series, see:

Short Rows using the wrap & turn method

Short Rows using the yarnover method

Short Rows using the Japanese method

Short Rows using the Shadow Wrap method