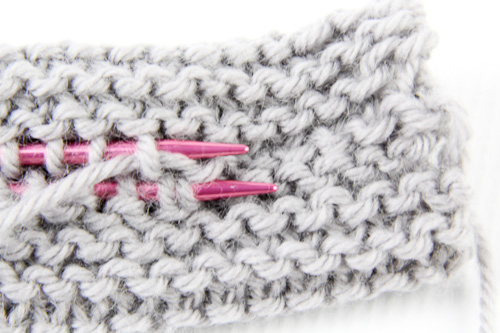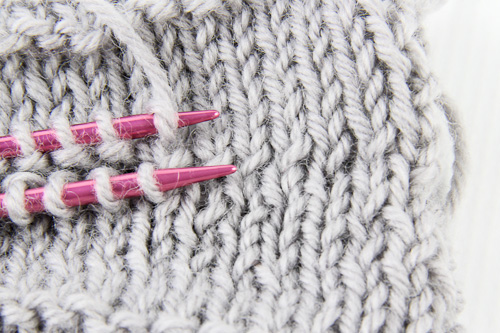
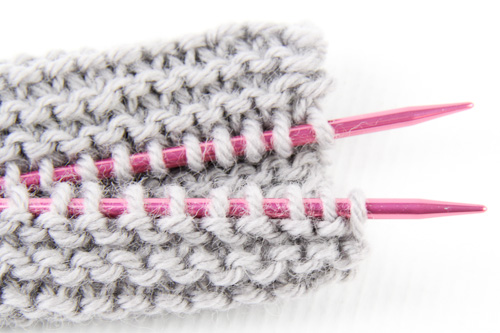
In addition to my Grafting Stockinette Stitch tutorial, I thought it would be helpful to demonstrate grafting in garter stitch; the live stitches of two pieces of garter fabric can be joined seamlessly and invisibly just as easily. You’ll need the live stitches divided equally on on two separate needles, a yarn needle, and a length of yarn at least 2 times the length of the finished seam – either a separate piece of yarn, or even better, the yarn tail from the last row.
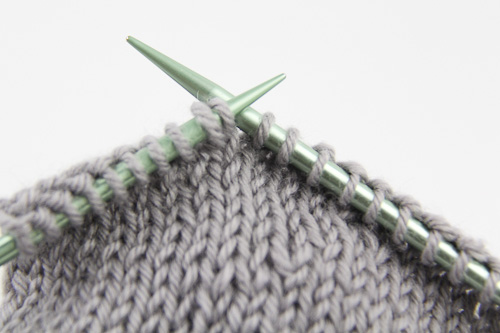
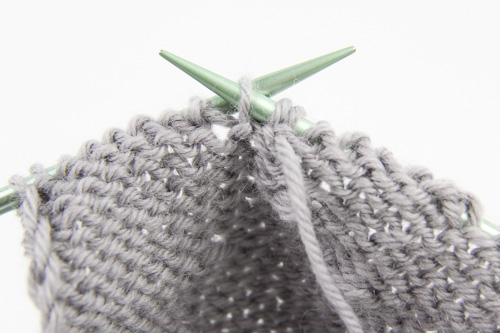
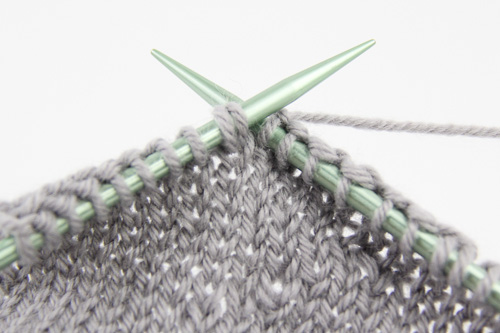
Hold the needles parallel, with WS (in this case, the private side of the work) facing together. Make sure both have the same number of stitches, and that there are purl bumps snug up against the front needle, and knit stitches against the back needle, as viewed from the outer, public sides.
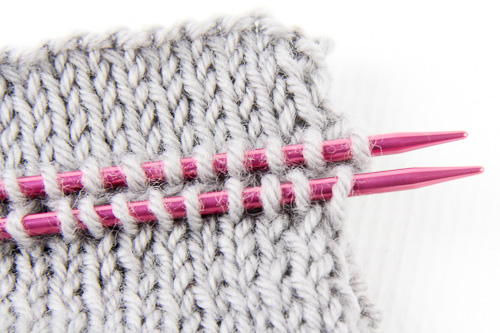
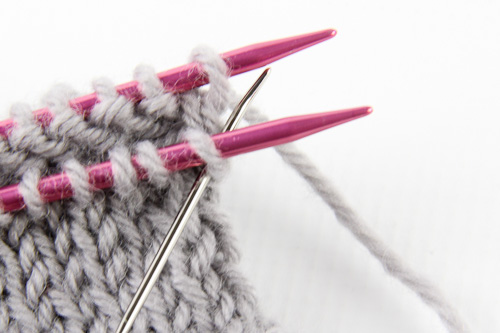
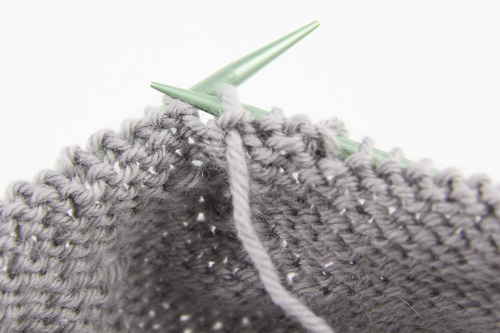
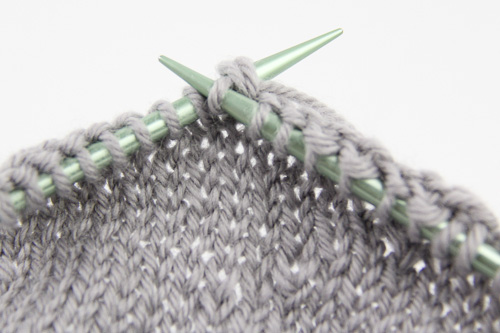
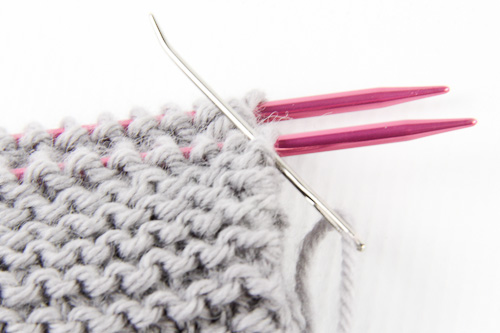
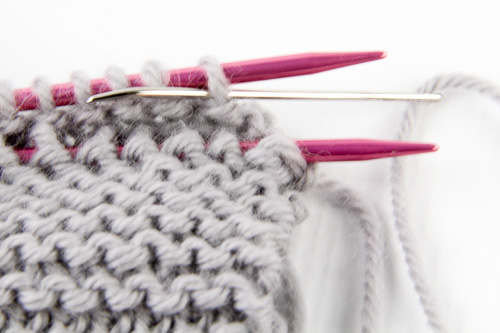
Setup 1 – insert yarn needle into the first stitch on the front needle purlwise, leaving the stitch on the needle:
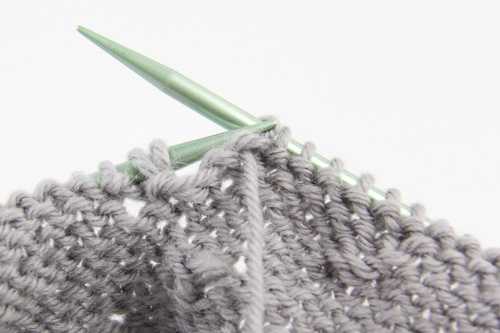
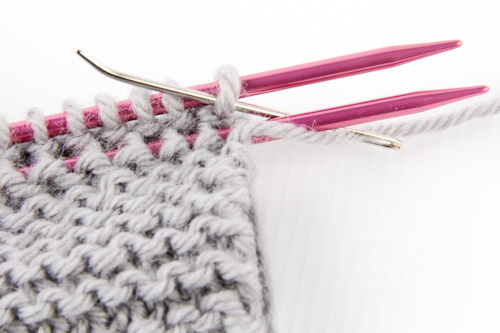
Setup 2 – insert yarn needle into the first stitch on the back needle purlwise, leaving the stitch on the needle:
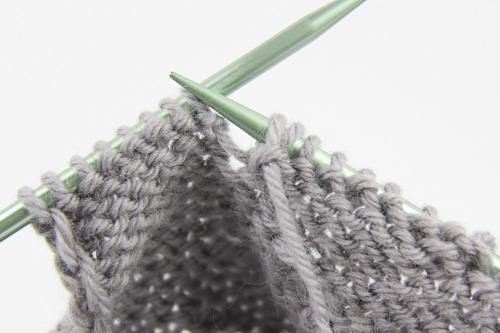
The two setup steps are worked only once. Pull the yarn gently through the stitches, making sure it travels underneath the needle tips, never over them.
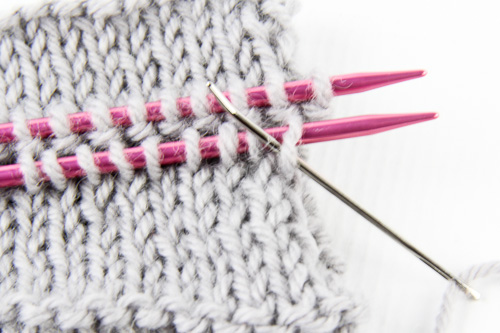
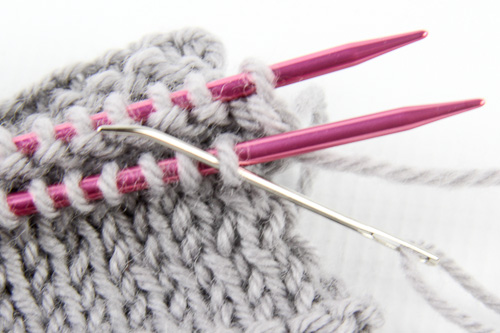
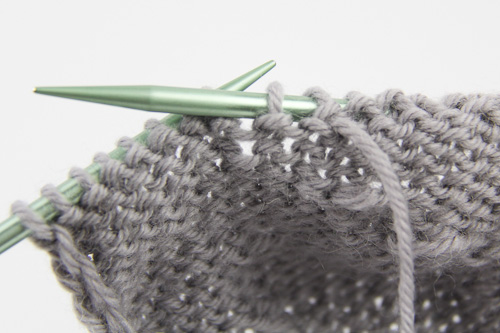
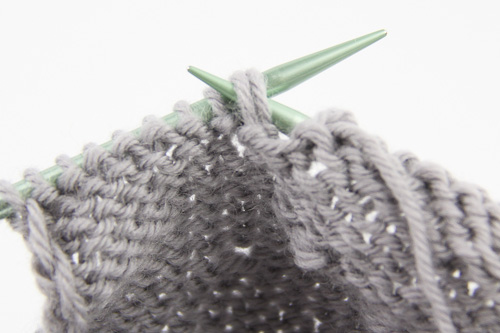
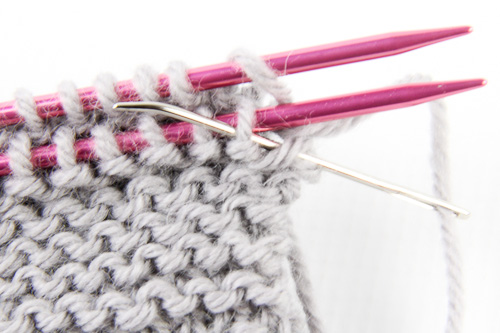
1. Insert yarn needle into the first stitch on the front needle knitwise, and slip the stitch off the needle:

2. Insert yarn needle into next stitch on the front needle purlwise, leaving the stitch on the needle:
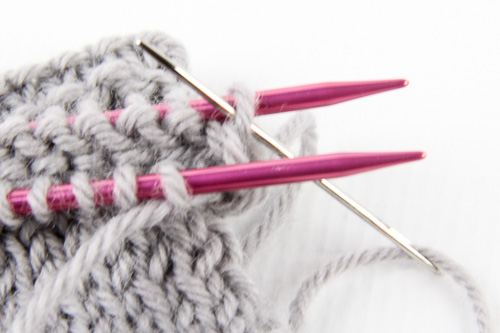
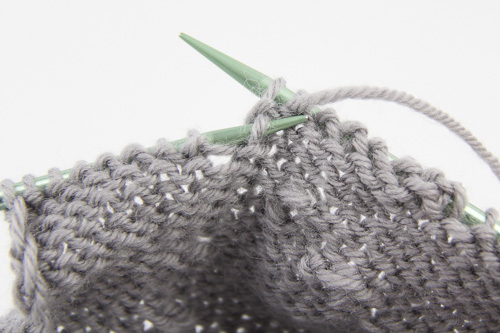
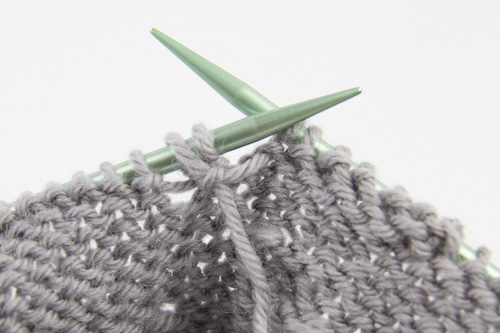
3. Insert yarn needle into the first stitch on the back needle knitwise, and slip the stitch off the needle:
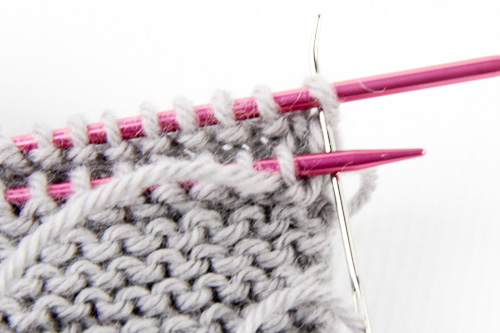
4. Insert yarn needle into next stitch on the back needle purlwise, leaving the stitch on the needle:
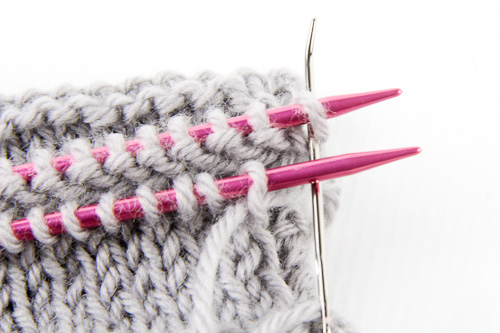
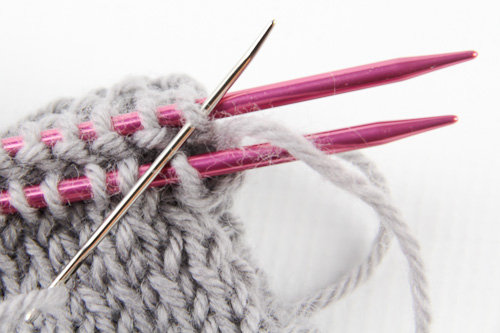
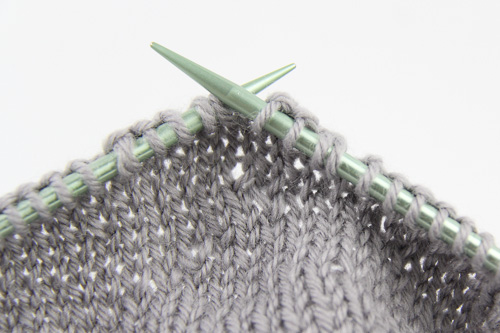
Repeat steps 1-4 until only 1 stitch remains on each front and back needle, then repeat steps 1 and 3. As you work, pull the yarn gently through the stitches, stopping every so often to adjust the graft by pulling on the grafting yarn. A loose tension can be tightened up stitch by stitch at the end, but pulling too tightly will cause the fabric to distort. Graft all the stitches, adjust the tension as needed and then block to enjoy your seamless join.