Aug 282014
 

SR YO tutorial | The Knitting Vortex

The second in my series of tutorials for working Short Rows demonstrates the yarnover method; this technique uses a backwards yarnover instead of wrapping the turning stitch, and then works that extra loop to disguise the turning point.

To yarnover on a knit row:

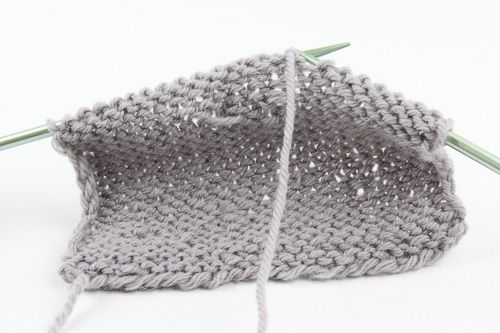
1. Knit to the turning point, and turn the work.
SR YO1 The Knitting Vortex

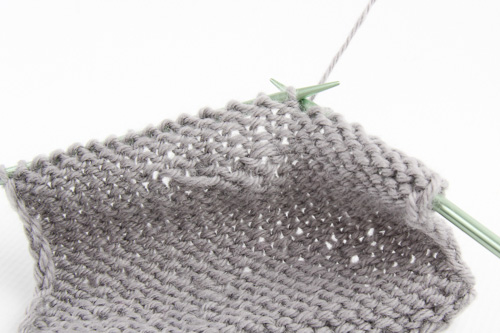
2. Make a backwards YO by bringing the yarn to the back between the needles . . .
SR YO2 The Knitting Vortex

3 .  . . . and then over the right needle to the front again; purl the next row. Purling that first stitch may be a bit fiddly with the yarnover coming over the needle, but it helps to hold it in place with your finger.
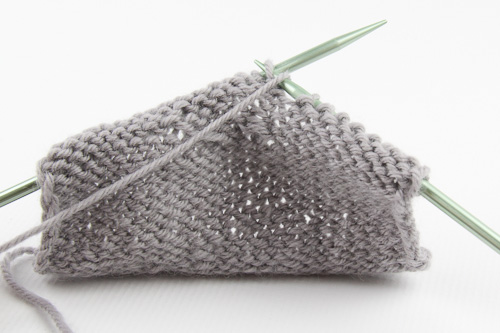
SR YO3 The Knitting Vortex

To yarnover on a purl row:

1. Purl to the turning point, and turn the work.
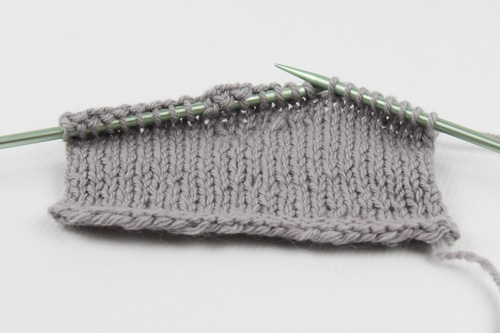
SR YO6 The Knitting Vortex

2. Make a backwards YO by bringing the yarn to the front between the needles . . .
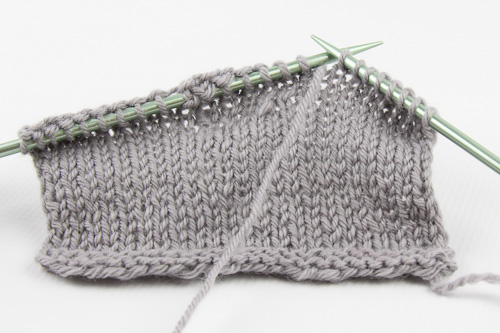
SR YO5 The Knitting Vortex

3.  . . . and then over the right needle to the back again; knit the next row.
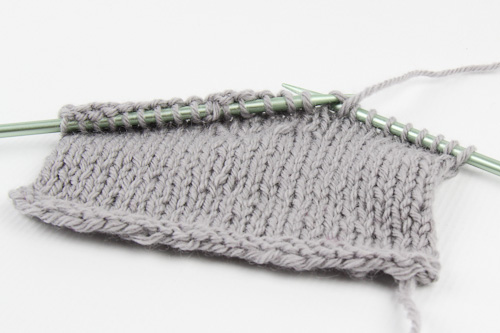
SR YO6 The Knitting Vortex

To work the yarnover on a knit row:

1. Knit to the YO, which will be mounted backwards on the left needle; slip the YO knitwise to the right needle, correcting the stitch mount.
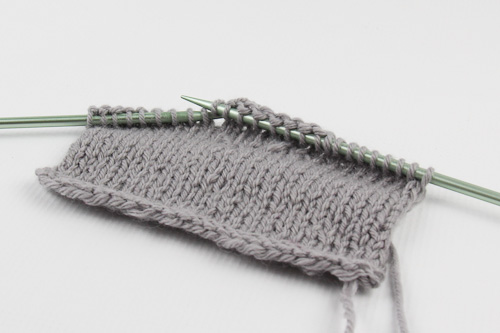
SR YO7 The Knitting Vortex

2. Return the YO to the left needle without twisting it.
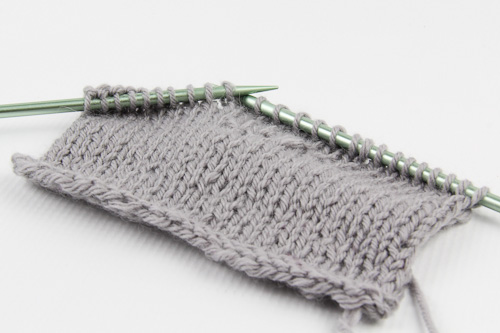
SR YO8 The Knitting Vortex

3. Knit the YO together with the next stitch.
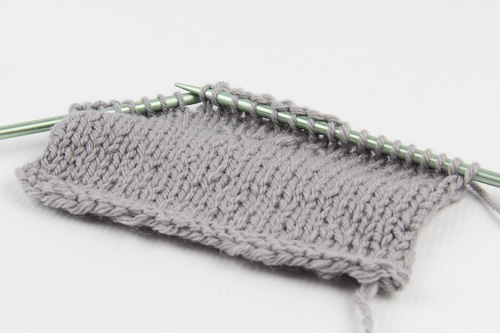
SR YO9 The Knitting Vortex

To work the yarnover on a purl row:

1. Purl to the YO, and slip the YO knitwise to the right needle, twisting it.
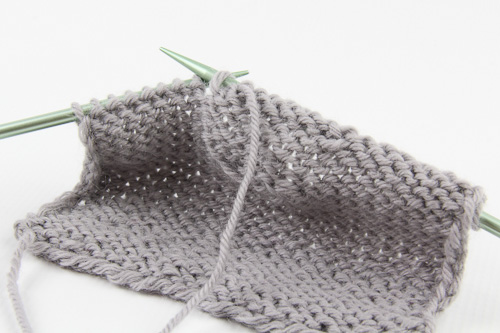
SR YO10 The Knitting Vortex

2. Slip the next stitch knitwise to the right needle, twisting it.
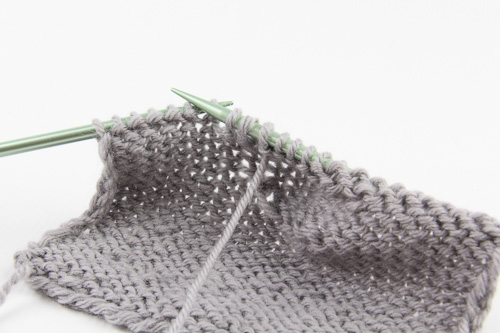
SR YO11 The Knitting Vortex

3. Return both the stitch and the YO to the left needle; both are mounted backwards.
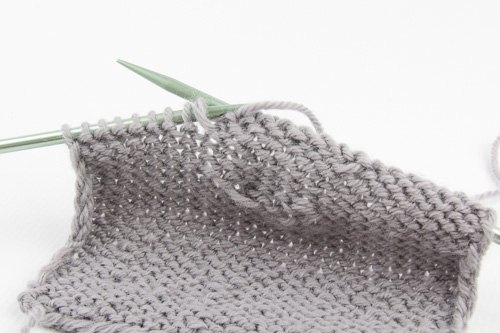
SR YO12 The Knitting Vortex

3. Purl the YO together with the next stitch through the back loops.
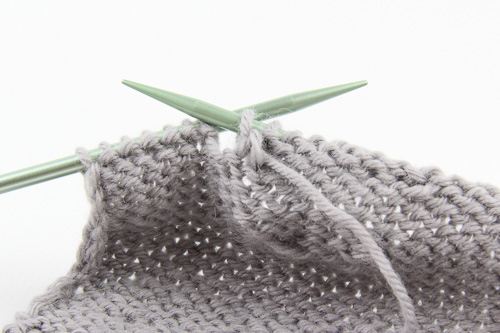
SR YO13 The Knitting Vortex

I find the yarnover method to have a bit of a sloppy result, especially on the purl side. For a better way to use yarnovers to disguise the turning point, the next tutorial will be Short Rows using the German method.

For the other tutorials in the Short Rows series, see:

Short Rows using the wrap & turn method

Short Rows using the German method

Short Rows using the Japanese method

Short Rows using the Shadow Wrap method

What I Did On My Summer Vacation 2014

 Images  Comments Off on What I Did On My Summer Vacation 2014
Aug 182014
 

Going bicoastal, and international as well, we followed my daughter’s Pacific Northwest leanings and visited Victoria, British Columbia and Seattle, Washington. It was ALOT of travel the first day, but then we woke up to this.

Victoria Harbor, B.C.

And traveled outside the old-timey sort of city for the nature part of the trip – beaches and trees.

Vancouver Island beach

Avatar grove, Vancouver Island

Repatriated once again, it was Seafair week, with ships and the Blue Angels.

Seafair fireboat, Seattle harbor

The entire trip was uncharacteristically sunny and hot (except for the last morning’s ride back to the airport), so we had great touristing.

Seattle

Which means we probably need to go back to experience the greyness.

All images courtesy of my panorama-loving spouse, Gary Karlsrud. Yes; used with permission.


Tarry

 New Release, Patterns, Sweaters  Comments Off on Tarry
Aug 082014
 

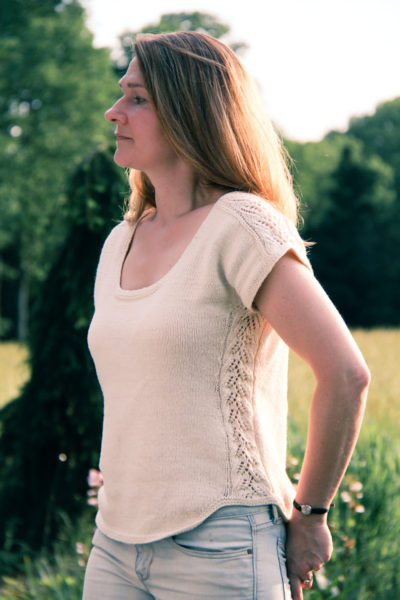
Stop and smell the roses; linger with the sunset, and tarry awhile. This relaxed tee is meant for lazy mornings, long lunches, and walks in the gentle moonlight. Worked seamlessly from the top down in a cotton and linen blend, it features lacy saddle shoulders for a touch of pretty whimsy, and a smooth stockinette body with matching lace panels at each side, all knit seamlessly to the rounded hems. Wear it on gentle, warm days wherever you wander.

Construction: Tarry is a feminine tee, designed to be easy and casual with a semi-fitted boxy silhouette. The lace shoulder saddles are worked first, then stitches are picked up for the front and and back, which are shaped with a few short rows and worked back and forth to the bottom of the armholes. The body is then joined to work in the round, including the lace insets at each sideseam, with gentle shaping through the waist and hip. The curved shirttail hem is worked back and forth using short rows, and finished all in one piece with the garter hem. Stitches are picked up at the scooped neckline and the armholes to work matching narrow garter edgings.

Techniques & Skills Used: knit/purl, increasing/decreasing, longtail CO, backwards loop CO, short rows, picking up stitches. The lace stitch pattern is both written and charted, and a link to my short row tutorial is included.

Size: 32 (35, 38, 41, 44, 48, 52)” bust; sample shown in third size worn with 3” of positive ease. For a slightly oversized fit, choose a size with several inches of positive ease.

Yarn: Knit Picks Cotlin (70% tanguis cotton, 30% linen; 123 yards/112m/50g), shown in Swan; 6 (6, 7, 8, 8, 9, 10) balls, or approximately 625 (700, 775, 875, 975, 1100, 1200) yards of dk weight linen/cotton or linen blend yarn.

Other Materials: US 5 (3.75mm) 32” circular needle or size to match gauge; US 4 (3.5mm) 16” circular needle or 32” if using Magic Loop method for neckline and armhole edging; Stitch markers (4); Stitch holders (2); Yarn needle.

Gauge: 22 st and 28 rows/4” in stockinette st; 20 st and 32 rows/4” in Lace pattern; after blocking.

See it on Ravelry or on Payhip, to read more or purchase the pattern.